Turn your home computer into a SSH + web server
Introduction
When you work with computers i think it is essential to experiment. You need to have a natural curiousity to learn. Yesterday i borrowed a small desktop computer from work, just to do some minor experiments, and to hold it as a home storage server.
The computer now works like a simple web and SSH server, and i can access it from wherever i am. Although it was a very easy job, i had a bit of fun doing it - that is why i am sharing.
The first thing is did was to install the very fine Linux distro, Linux Mint (which is based on Ubuntu), from my dvd-disc i got in a "Linux User and Developer"-magazine.
The firewall
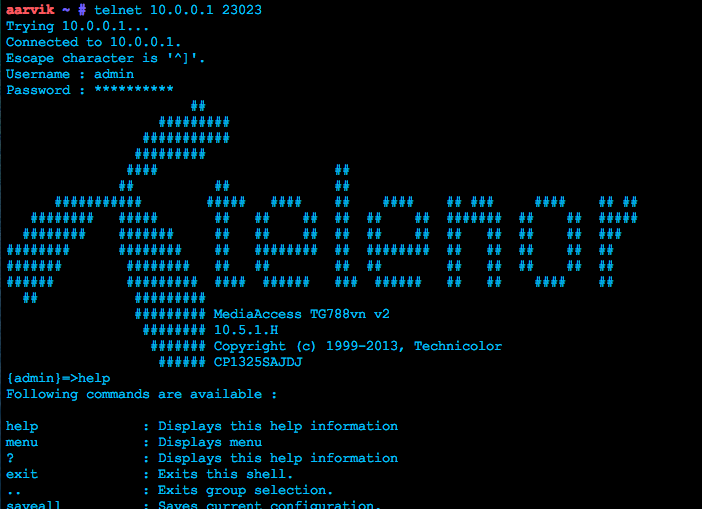
Then i opened up for the firewall in the router. I opened up for incoming packets at port 22 (default SSH) and port 80 (default HTTP). How this is done varies from router to router, and also depends on which company it is from. I got a cheap router from the danish telephone and internet company Telenor, and after a bit of research i figured out i could connect to it through telnet. So i did.
Usually the LAN ip for the network is 10.0.0.0 or 192.168.0.0. It is normal that your router/gateway got the local ip 192.168.0.1 or 10.0.0.1.
Figure out what LAN network ip your network offers by running $ ifconfig -a, and use the $ route -n command to find the ip-address for your gateway. Mine was 10.0.0.0, and my gateway got address 10.0.0.1
So i connected to the router through telnet and opened up for incoming packets for port 22 and 80.
The IP-addressing
The default for, i would say, all routers is to use DHCP to assign ip-addresses to the connected computers automatically. It is important to understand that your computer does not got a ip-address to identify it. Your network interface (eg. eth0) connected with your computer got a ip-address, which you connect through.
To be sure that my ip-address is always the same, when i have to connect, i configured my eth0 interface to use a static ip (10.0.0.50). I did this with the following content in /etc/network/interfaces.
$ vim /etc/network/interfaces:
# Auto generated lo interface
auto lo
iface lo inet loopback

# Static ip for eth0 interface.
iface eth0 inet static
     address 10.0.0.50
     network 10.0.0.0
     netmask 255.255.255.0
     broadcast 10.0.0.255
     gateway 10.0.0.1
With this i have assigned the local ip 10.0.0.50 to my computer.
Now restart your network to assign the new static ip:
$ sudo service network restart
The software
Now i think it is time to install the software we need to use, from our dear apt-get package manager.
For the SSH server we will install openssh-server, and apache2 for the HTTP/web server:
$ sudo apt-get install apache2 openssh-server
These packages should be working straight out of the box. Test if the SSH server locally works by connecting through SSH to it. Do $ ssh root@localhost. To test the HTTP server try to connect to http://localhost through your web browser or use curl with $ curl localhost. Make sure you have started the daemons by using the service-command: $ sudo service [ssh|apache2] [start|restart|stop|status|etc.]
The public connection
Now if you want to connect to your machine through the outside internet you need to know your public ip. The ip from your router, which the outside world have access to. There is several ways of finding out, and many websites offering "What is my ip"-services. A simpler way is just to curl this URL (from one my domains):
$ curl -L http://aargrassiv.dk/myip/
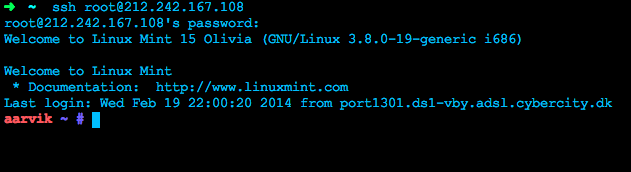
My ip was 212.242.167.108, so i tested with this.
Now try to connect through this public ip instead, and verify if it works. Start with accessing http://212.242.167.108 to test the HTTP server, and then test with SSH by using your public IP-address instead of localhost, like in my case: $ ssh root@212.242.167.108:
A short introduction to nc
If this does not work, you should start to debug the network. Start with your firewall, and check if your ports really are open. I recommend the nc-command (netcat) to do this.
Description of nc (source: man page):
The nc (or netcat) utility is used for just about anything under the sun involving TCP, UDP, or UNIX-domain sockets. It can open TCP connections, send UDP packets, listen on arbitrary TCP and UDP ports, do port scanning, and deal with both IPv4 and IPv6. Unlike telnet(1), nc scripts nicely, and separates error messages onto standard error instead of sending them to standard output, as telnet(1) does with some.
To use nc for port scanning use the -z flag, and for verbose mode (more information) use the -v flag. After the flags, write the ip-address to scan, followed by the port to scan. My output ended up like this:
➜  ~  nc -zv 212.242.167.108 22
found 0 associations
found 1 connections:
     1:    flags=82<CONNECTED,PREFERRED>
    outif en0
    src 10.0.0.51 port 50594
    dst 212.242.167.108 port 22
    rank info not available
    TCP aux info available

Connection to 212.242.167.108 port 22 [tcp/ssh] succeeded!
➜  ~  nc -zv 212.242.167.108 80
found 0 associations
found 1 connections:
     1:    flags=82<CONNECTED,PREFERRED>
    outif en0
    src 10.0.0.51 port 50595
    dst 212.242.167.108 port 80
    rank info not available
    TCP aux info available
If this is all right like above, check your ip-addressing, the application, deeper in the firewall (eg. if the NAT is all right), and test locally.